Reviving Vintage Furniture: Essential Restoration Techniques
Vintage furniture restoration is more than a craft—it’s an art form that bridges the charm of the past with the functionality and style of the present. By understanding key restoration techniques, you can breathe new life into tired, classic pieces, preserving their story while making them relevant for modern living. This guide delves into the essential steps and considerations in reviving vintage treasures, from initial assessment to finishing touches, empowering both enthusiasts and beginners to transform old furniture into enduring masterpieces.
Preparing for Restoration
Workspace Setup and Safety
An organized, clean workspace not only improves efficiency but also safety. Set up your restoration area in a well-ventilated space with ample lighting to spot details and flaws. Invest in personal protective equipment such as gloves, masks, and goggles to shield yourself from dust, fumes, and chemicals. Arrange tools and materials within reach to avoid disruption and accidents during the process. A designated space allows you to thoroughly assess, treat, and store the furniture safely between sessions.

Gathering Essential Tools and Materials
Selecting the appropriate tools is key to avoiding damage and achieving refined results. Basic restoration toolkits typically include screwdrivers, chisels, hammers, sanding blocks, and clamps, while specialty items, such as scrapers, rotary tools, and veneering supplies, tackle advanced tasks. Choose finishing products—such as stains, varnishes, and waxes—compatible with the piece’s age and materials. Ensure that all your products are in good condition and read instructions thoroughly before applying anything to the furniture’s surface.
Identifying and Repairing Structural Damage
Diagnosing Weakness and Instability
Begin by checking for wobbles, creaks, or separation at joints—these are telltale signs of compromised structure. Study the construction techniques originally used, such as dovetailing or mortise-and-tenon joints, to determine how repairs can be made with minimal intervention. Gently stress each component to reveal hidden fractures or fatigue, taking note of any previous, poorly executed repairs that may need correction. Accurate assessment at this stage prevents future failure and lays a solid foundation for decorative restoration.
Repairing Joints and Fasteners
Restoring joints often involves disassembly, cleaning, and regluing with high-quality adhesives suitable for vintage wood types. Use reversible glues like animal hide glue on antiques, which allow future repairs without damaging the wood. Reinforce weakened areas with discreetly placed screws, dowels, or brackets, ensuring they are in keeping with the original construction. Test each repair for stability before reassembling the piece, as premature finishing can mask unresolved structural issues.
Addressing Broken Components
When original parts like legs, arms, or supports are damaged beyond basic repair, consider fabricating replacements using wood species and profiles similar to the original. Skillfully match repairs to the existing patina and grain pattern to blend seamlessly. Take care to retain and reintegrate as much of the original material as possible for authenticity. For challenging repairs, consult a professional restorer or conservator to execute complex joinery or carving while safeguarding the piece’s historical value.
Treating Surfaces: Cleaning, Stripping, and Sanding
Deep Cleaning and Grime Removal
Thick layers of grime, wax, and polish can obscure a piece’s original condition. Use non-abrasive cleaners specifically designed for antique woods to lift away dirt without harming the substrate. Avoid strong chemicals that might strip off dyes or fade decorative details. Work in small sections and use soft cloths or brushes to prevent scratching vulnerable surfaces. If unknown substances are present, experiment cautiously on inconspicuous areas to determine the safest cleaning regimen.
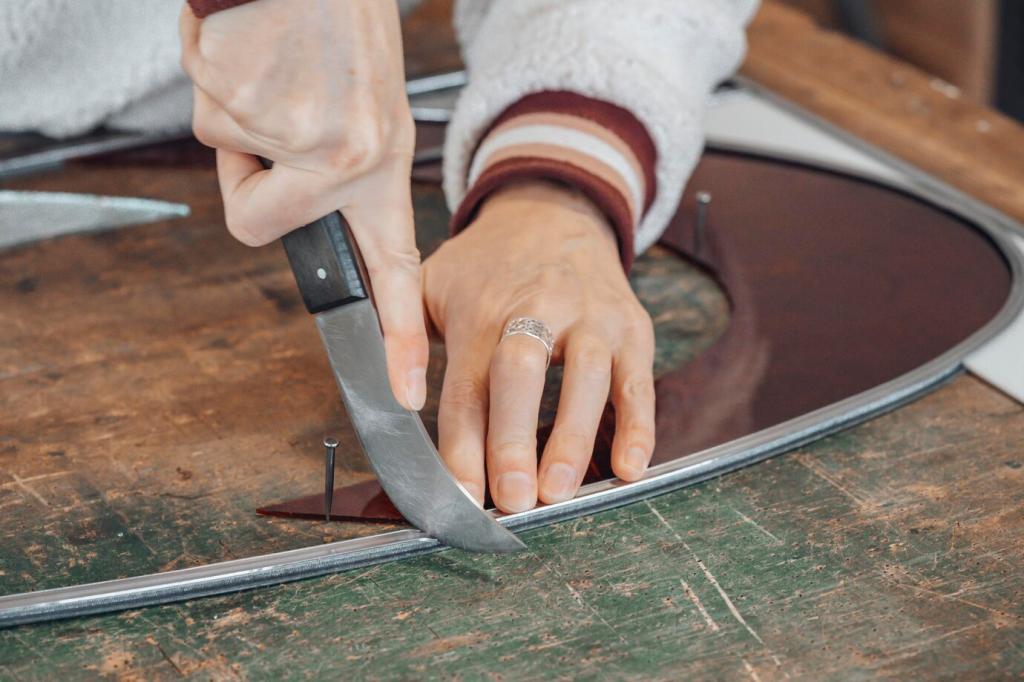
Paint and Finish Removal
Old paint and varnish may flake or yellow over time, hiding intricate craftsmanship or beautiful veneer. Stripping agents specifically formulated for historic woods can dissolve these layers without excessive abrasion. Apply stripper with care, following the manufacturer’s directions, and gently scrape residue using wooden or plastic tools. Avoid aggressive sanding, particularly on veneered surfaces, as this risks thinning or puncturing precious materials. Preserve any original gilding, stenciling, or inlay work by masking or working delicately around these features.
Sanding and Surface Preparation
Once finishes are removed and surfaces cleaned, sanding smooths minor imperfections and prepares wood for new treatments. Begin with a fine-grit sandpaper to avoid gouging fragile areas, and always follow the grain to maintain a uniform texture. For detailed carvings or moldings, use sanding pads or specialty tools to reach intricacies. Take extra care with marquetry and veneer, using hand sanding instead of power tools. The goal is to create a receptive surface for finishing products while preserving the depth and contours of the original craftsmanship.
Repairing and Replacing Veneer
Assessing Veneer Condition
Examine the veneer thoroughly for signs of lifting, cracking, bubbling, or loss. Tap gently and listen for hollow sounds that indicate separation from the substrate. Check for mismatched repairs or overly heavy sanding that may have thinned sections. Deciding whether repair or replacement is necessary depends on the veneer’s overall condition and the feasibility of reattaching loosened areas without further damage. Take detailed photographs for reference before proceeding with significant interventions.
Reattaching Loose Veneer
Loose or bubbling veneer can usually be re-glued, provided that the wood is not warped or splintered. Gently lift the veneer to apply a suitable adhesive, such as PVA or hide glue, according to the type and era of the piece. Press the veneer flat with a padded clamp or weighted board, taking care to protect the surface underneath. Allow ample drying time and check for proper adhesion before moving on. Successful reattachment requires patience and a steady hand to avoid creating new gaps or misalignments.
Replacing Missing Sections
When veneer is too damaged or absent, it must be replaced with a similar species, thickness, and grain pattern to blend harmoniously. Cut the replacement patch precisely, feathering the edges to match the existing veneer seamlessly. Test for fit multiple times before gluing, and use fine sandpaper to complete the join. Stain or finish the new veneer to complement the surrounding area, ensuring consistent color and reflection. Well-matched veneer repairs enhance both beauty and longevity without drawing attention as afterthoughts.
Addressing Hardware and Decorative Elements
Cleaning and Polishing Hardware
Metal hardware can accrue grime, corrosion, or old coatings that obscure its detail and shine. Remove hardware carefully, noting the placement and orientation for accurate reassembly. Clean brass, bronze, or iron components using gentle, non-abrasive solutions to avoid scratching or further oxidation. For stubborn tarnish, specialized metal polishes can restore luster, but always test in inconspicuous areas to prevent unintended discoloration. Avoid over-polishing, which risks erasing character or historical finishes provided by natural patina.
Repairing or Replacing Components
Missing or broken knobs, pulls, or hinges often detract from a piece’s visual harmony and usability. Whenever possible, repair original hardware using soldering, straightening, or minor re-casting. If replacements are necessary, seek antique hardware dealers or reproduction suppliers to match materials and styles precisely. Avoid modern hardware that clashes with the piece’s period look. Secure fittings with appropriate screws or fasteners to ensure long-lasting performance without causing stress or damage to supporting wood.
Restoring Decorative Details
Ornamental moldings, inlays, and carvings can distinguish a furniture piece, but these fragile areas are easily damaged or lost over time. Restore missing or chipped moldings with skillfully crafted wood or resin patches, shaped to mirror original profiles. Re-secure loose banding or marquetry using fine adhesives and patient clamping. Clean decorative elements gently, as overzealous scrubbing can strip away gilding or painted details. Attending to these fine points ensures the piece’s personality and historical appeal remain intact.
Refinishing and Applying Protective Coatings
Selecting the Right Finish
The choice of finish—varnish, oil, shellac, lacquer, or wax—should align with the original or intended style of the piece. Each finish offers different benefits in terms of protection, sheen, and repairability. For historical accuracy, research the types of finishes used during the furniture’s period of manufacture and select accordingly. Modern finishes may offer improved protection, but traditional finishes often provide a more authentic look and feel. Consider environmental factors, such as sun exposure or humidity, that could affect the finish’s longevity.
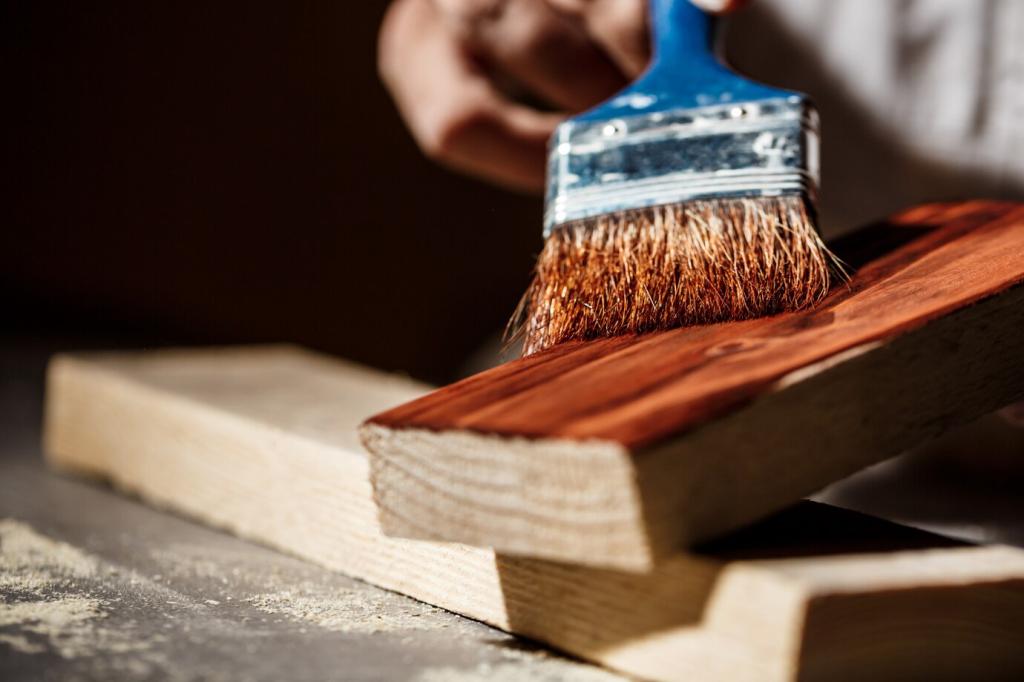
Applying Finishes with Skill
Proper application is key to achieving a smooth and durable surface. Begin by working in thin, even coats and always follow the wood’s grain. Use high-quality brushes, lint-free cloths, or spray equipment depending on the type of finish. Allow each layer to dry thoroughly before sanding lightly and applying the next coat. Multiple layers yield greater depth and resilience, but patience is required to avoid drips or streaks. Good ventilation prevents buildup of fumes, and careful technique ensures a professional result that highlights the furniture’s best features.
Buffing and Polishing for Final Luster
Once the finish has cured, buffing and polishing create a tactile, gleaming surface that feels as good as it looks. Use fine steel wool or specialty pads to smooth minor imperfections, followed by a soft cloth to bring out the luster. Waxes or polish can add a final layer of protection while augmenting the depth of shine. Regular maintenance with gentle cleaning and occasional polishing will keep the finish pristine, helping your restored piece age gracefully over time.