Step-by-Step Guide to Restoring Vintage Wooden Furniture
Restoring vintage wooden furniture is both an art and a rewarding DIY project. Breathing new life into old, worn pieces can transform your space and preserve a piece of history. Whether your furniture is a cherished family heirloom or a flea market find, this guide will walk you through each stage of restoration. You’ll learn how to assess the condition of your piece, clean and prepare the surfaces, address structural repairs, and apply the finishing touches that bring out the natural beauty of the wood. With patience and care, restoring vintage wooden furniture can be a fulfilling project that yields stunning results and years of continued enjoyment.
Assessing the Condition of Your Vintage Furniture
01
Identifying Damage and Wear
Begin by carefully examining your furniture for common issues such as scratches, dents, stains, or warping. Look for signs of wood rot, insect damage, and loose joints, all of which can compromise the structural stability. Identifying the extent and type of wear is crucial for deciding the appropriate level of intervention. Sometimes, age-related patina adds character, so distinguish between desirable aging and actual damage. If you notice missing pieces or hardware, make note of these for later replacement or repair. Understanding whether your piece was constructed with veneers or solid wood can also inform your approach, as each material requires slightly different care.
02
Understanding the Original Finish
After assessing physical damage, it’s essential to determine what kind of finish your furniture originally had. Common finishes include shellac, lacquer, varnish, or oil, and knowing the difference is key for choosing restoration products. Test a discreet area using a cotton swab and a small amount of rubbing alcohol—if the finish dissolves, it’s likely shellac. This insight helps you select the best cleaning methods, stripping agents, and finishing products to use later. Preserving as much of the original finish as possible maintains the authenticity and value of your vintage piece, especially for antiques.
03
Evaluating Structural Stability
Gently test the sturdiness of your furniture by shaking it or putting slight weight on different areas. Rocking chairs, tabletops, legs, and arms should be firm and stable. Pay careful attention to dowel joints, glued corners, and screws, as old adhesive and hardware can degrade over time. If a piece wobbles or creaks, you may need to reinforce or reglue joints during the restoration process. Structural integrity is paramount—not only for the safety and longevity of the item but also to ensure your finishing efforts are built on a solid foundation. Document any concerns to address them systematically as you proceed through your project.
Cleaning and Preparing Your Furniture
Removing Surface Dirt and Old Polish
The first cleaning step is to gently remove accumulated dust, sticky residue, and old furniture polish. Use a soft cloth lightly dampened with warm, soapy water or a specialized wood cleaner, taking care not to soak the wood. For corners and carvings, a soft brush can lift stubborn dirt. Avoid harsh chemicals which may damage the existing finish or wood fibers. Often, a simple but thorough cleaning reveals hidden grain patterns or previously obscured beauty. Once the surface is clean and dry, assess whether additional steps such as stripping are necessary or if a refreshed look is achieved with minimal intervention.
Stripping Old Finishes
If the original finish is severely damaged, discolored, or incompatible with your restoration goals, stripping may be required. Apply a gentle, furniture-grade stripper according to manufacturer instructions, working in small sections for control. Scrape away loosened finish with a plastic scraper or steel wool, always following the wood grain. Multiple applications may be needed for deeply embedded finishes or varnishes. Throughout this process, protective gloves and proper ventilation are essential. Stripped wood should be left smooth and residue-free. This painstaking removal process lays the groundwork for applying a new finish while preserving wood details and craftsmanship.
Sanding for a Smooth Surface
Once the wood is clean and stripped, sanding prepares the surface for repairs and finishing. Begin with a medium-grit sandpaper, gradually moving to finer grits for a silky texture. Always sand along the grain to minimize scratches and achieve a professional result. Pay special attention to rounded edges and ornate carvings using hand sanding techniques as needed. The goal is not to obliterate all marks of age, but to create a smooth, even surface ready to accept stains or topcoats. After sanding, meticulously remove dust with a tack cloth or vacuum brush to prevent imperfections in the finishing steps.
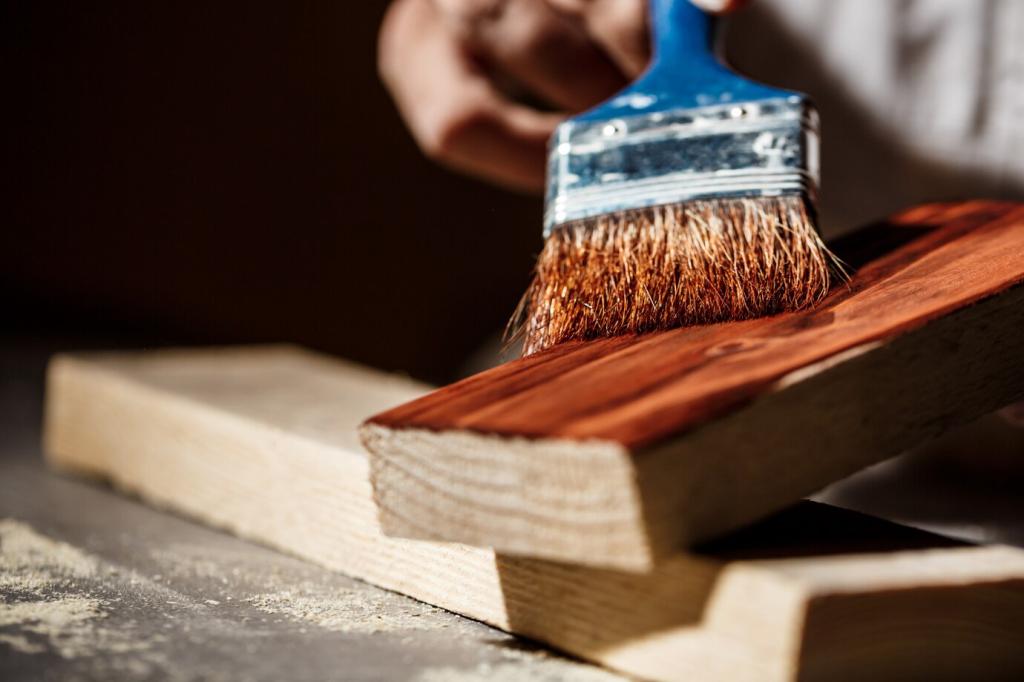
Fixing Cracks, Chips, and Holes
Start by assessing the severity of cracks or chips in the wood. Small splits or gouges can often be filled with a high-quality wood filler or custom-mixed sawdust and glue. Use a putty knife to press the filler into damaged areas, overfilling slightly to account for shrinkage. Allow it to dry thoroughly before sanding flush. For larger cracks, consider a wood patch or replacing the damaged section entirely if feasible. Matching the grain and color as closely as possible maintains the piece’s authenticity. These careful repairs strengthen vulnerable areas, ensure durability, and prepare the piece for a seamless finish application.
Replacing or Re-gluing Loose Joints
Over time, glue in wooden joints can weaken, causing wobbles and instability. Disassemble loose joints if possible, cleaning out old glue with a small brush or chisel. Apply fresh wood glue along the joint, then clamp firmly while the adhesive cures according to manufacturer directions. For joints reinforced with dowels or screws, inspect these elements for breakage or rust and replace as needed with period-appropriate hardware. Securing each joint tightly not only restores functionality but also preserves the original aesthetic and value of the furniture, allowing it to be used safely for years to come.
Repairing or Replacing Missing Hardware
Vintage furniture often comes with unique knobs, handles, or decorative hardware. If pieces are missing or broken, try to source identical replacements from antique shops or specialized suppliers. Where original hardware can’t be found, select reproductions that closely match in style, size, and finish. Reattach loose elements securely using appropriate screws or fasteners, taking care not to strip or damage the surrounding wood. In some cases, you may need to gently clean or polish metal components to restore their luster. Attending to these details not only completes the restoration but also honors the craftsmanship of the original piece.